
How to Change the Mouthpiece on a Scuba Regulator: A Step-by-Step Guide
Posted by Will Taylor on on Apr 18th 2024
How to Change the Mouthpiece on a Scuba Regulator: A Step-by-Step Guide
Changing the mouthpiece of a scuba regulator is an essential skill for divers. It ensures comfort and safety underwater, and it's a maintenance task that can easily be done at home with the right tools and steps. This article provides a detailed, step-by-step guide on how to replace a worn or uncomfortable mouthpiece on your scuba regulator.
Step 1: Gather Your Materials
Before you start, make sure you have all the necessary materials:
- A new regulator mouthpiece (compatible with your regulator model)
- Small zip tie (usually provided with the new mouthpiece)
- Side cutters, scissors, wire cutters
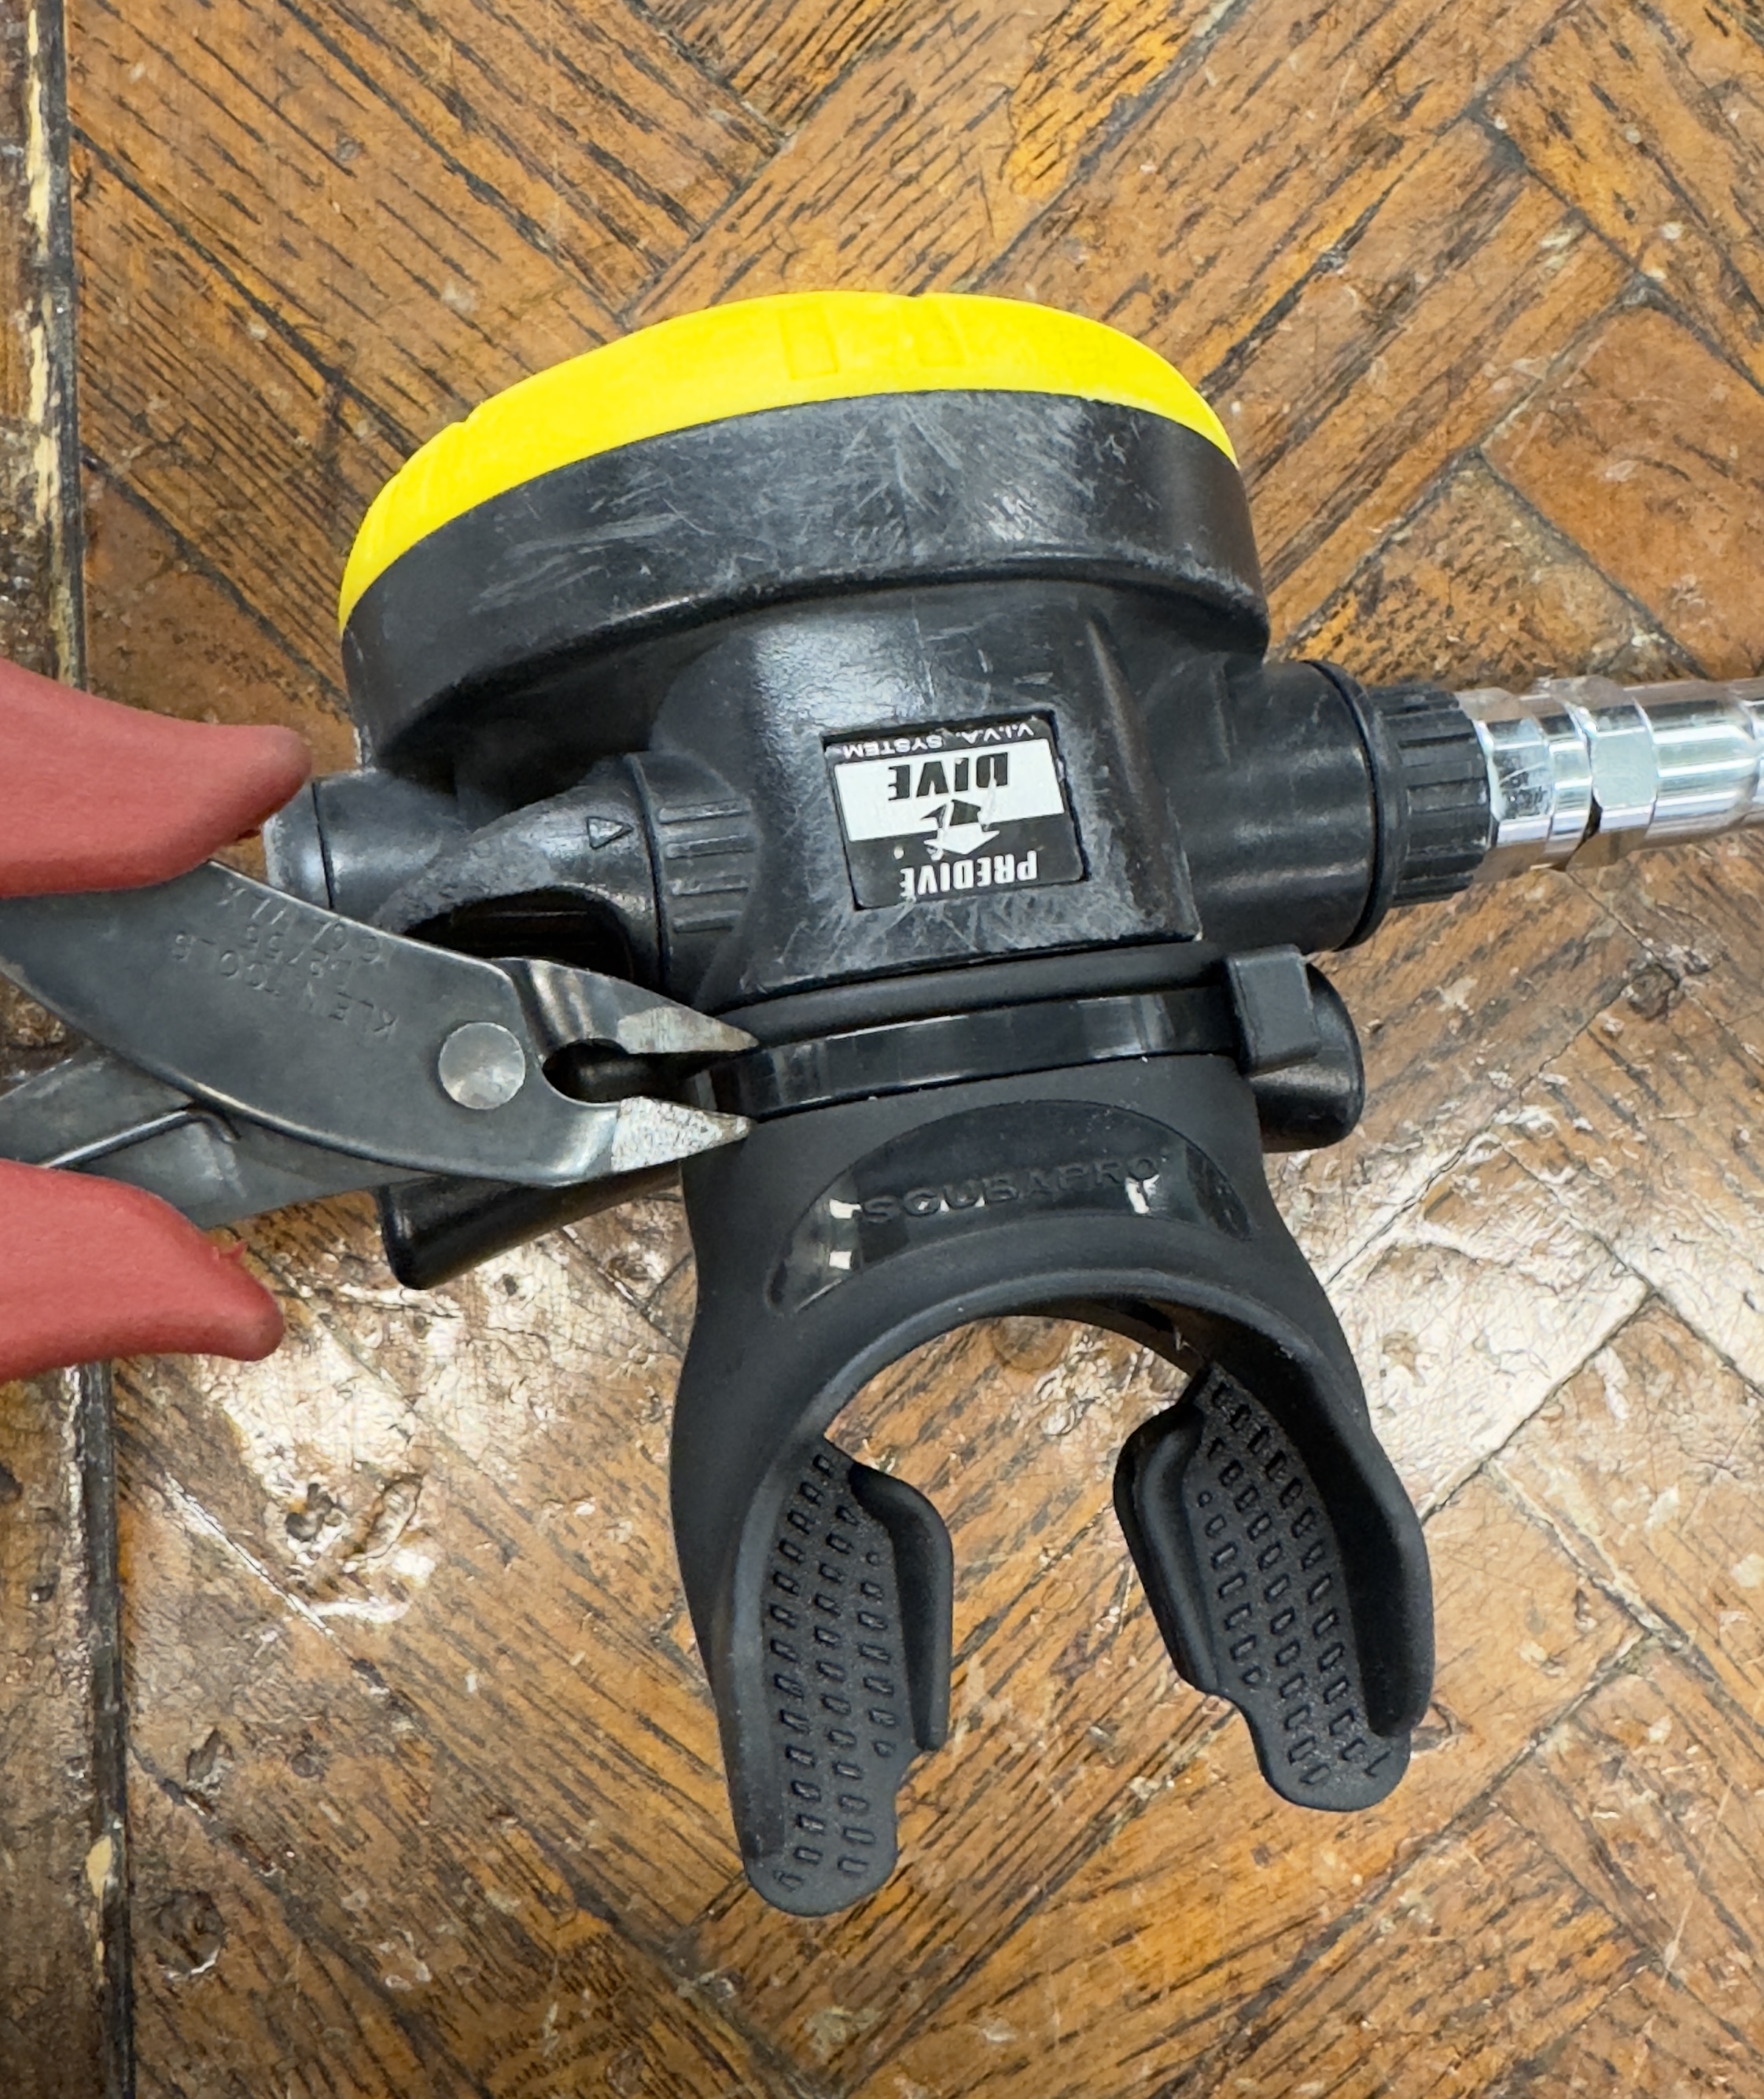
Step 2: Remove the Old Mouthpiece
Locate the zip tie or clamp that secures the mouthpiece to the regulator's bite tabs. Using the side cutters or scissors, carefully cut the zip tie. Be cautious not to cut or damage the bite tabs or the regulator hose.
Once the securing mechanism is removed, gently pull the mouthpiece off the regulator. Some mouthpieces might be tight, so a bit of wiggling might be necessary to get it off. If it’s particularly stubborn, dipping the connection area in warm water can help loosen it.
Step 4: Clean the Regulator
With the old mouthpiece removed, take a moment to clean the area where it was attached. Wipe the bite tabs with a clean cloth to remove any debris or residue that could affect the attachment of the new mouthpiece.
Step 5: Install the New Mouthpiece
Remove the new mouthpiece from the warm water and shake off excess liquid. Align it with the regulator's bite tabs, ensuring that the orientation is correct (the larger bite bump should be on the bottom). Slide the mouthpiece onto the tabs until it's fully seated.
Step 6: Secure the New Mouthpiece
Once the new mouthpiece is in place, take the zip ties and slide one through the small holes or slots at the base of the mouthpiece where it meets the regulator. Tighten the zip tie until it’s snug, but be careful not to over-tighten as this can damage the silicone. Trim any excess length from the zip tie using side cutters or scissors.
Step 7: Inspect and Test
After securing the new mouthpiece, inspect your work. Make sure there are no gaps between the mouthpiece and the bite tabs, and that the mouthpiece itself is not twisted or misaligned.
It’s also a good idea to perform a basic function test. Attach the regulator to a scuba tank, turn on the air, and breathe from the regulator. Check for any air leaks around the new mouthpiece. If you detect any leaks or it feels uncomfortable, adjust as necessary.
Step 8: Final Thoughts
Changing a mouthpiece is a straightforward process that can significantly enhance your diving experience by ensuring your regulator is as comfortable as possible. Always use high-quality mouthpieces designed for your specific regulator model to ensure the best fit and performance.
Regular maintenance, including mouthpiece inspection and replacement, is crucial for safe and enjoyable diving. Always check your equipment before and after dives to keep it in optimal condition.
Conclusion
By following these detailed steps, you can efficiently and safely replace the mouthpiece on your scuba regulator. This not only prolongs the life of your equipment but also supports a comfortable and enjoyable diving experience. Happy diving!